How to install decals
How to install decals
How to install your decals, graphics and race numbers?
Check out our Application Process videos to get the most out of your decals.
We will describe how to get the most out of your new decals and prolong their life. Below you will see 3 steps.
Step 1 Remove Old Decals
Step 2. Arrival of New Motocal Decals (Storage & Preparation)
Step 3. Application of New Motocal Decals
Step 1. Remove Old Decals
We highly recommend giving your vehicle a good clean. The cleaner your machine the better the results you’ll get in applying your decals.
We suggest that you strip your bike of your old decals that you no longer need (only do this for the decals you have just ordered – not the ones you want to remain on the vehicle)
The effort required when removing decals can differ depending on the quality of your old decals. With a very good quality decals (like Motocal’s decals) you can simply heat the decal with a hair dryer (not too much) then start to peel it off slowly and continue to peel until the decal is completely removed from the surface of the vehicle.
Now you are decals are removed
Now that you have your decals removed you want to prepare the surface to ensure there is no film of dirt, grease, or any other barrier that may inhibit the decal from getting the proper adhesion to the vehicle surface. Use a lint free cloth (a cloth that doesn’t give off any fabric from the cloth) and spray the machine surface. You can leave this on for a minute or two to break down the film of dirt/grease. Then wipe off to fully remove. The clearer the surface the better your new decals will stick.
If fit with a poor quality decal and you have adhesive left on the surface of your machine you will need to either:
- Use a heat gun/hair dryer to break down the adhesive and scrape off
- Use adhesive removal and then scrape off the adhesive
You will never have to do this with Motocal’s decals as our material is superior to most and we never use lower quality materials that will do this.
Now your machine is fully prepared for your new self-designed graphics kit that should be with you in a few days.
Step 1. Remove Old Decals
When your self-designed decals arrive they will either be flat packed or rolled into a tube. This is depending on the decals and materials involved. We test all our decal materials and only handle them in accordance with testing.
We highly recommend that you bring your decals in to your house for 12/24 hours to bring them up to room temperature. The decals will be more malleable this way and you will get better results when applying them. It will also be easier!
Flat Package
We recommend storing at room temperature for 12/24 hours in the flat package.
Tube Package
We recommend storing at room temperature for 12/24 hours laid flat so when you apply them they will be easier to apply. Our high quality materials don’t have a memory so when they are laid flat they will assume that position for ever more. Just like when they are applied to your machine they will match the surface curves perfectly.
Step 3. Applying Your New Decals
Your vehicle and your decals are ready for installation and it’s time to apply your graphics to give your bike a facelift! It will make a serious difference to your machine’s appearance.
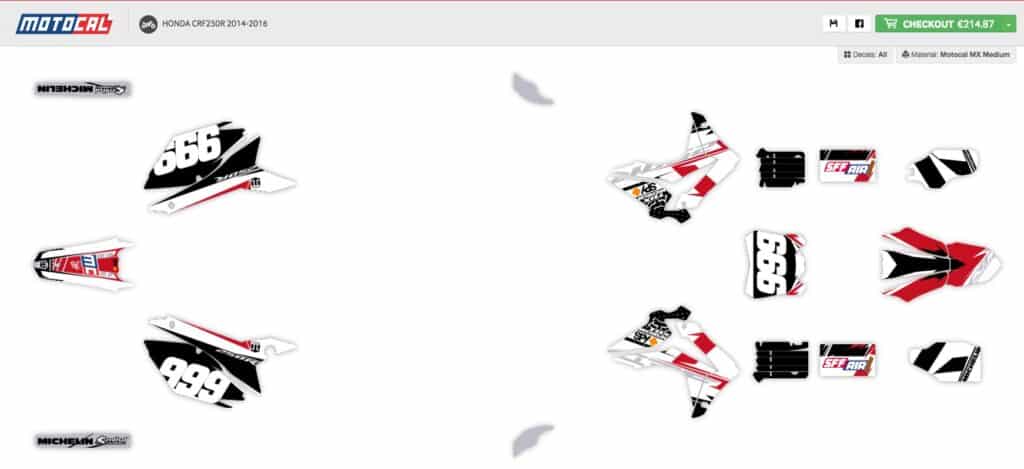
You should use Motocal’s unique vehicle layout (The design layout on screen or the design layout with your confirmation email at time of purchase). This will act as a legend to ensure you put the correct decal on the correct part of the vehicle. If you have a tablet at the time of fitting you can simply click each decal to see it’s name and hence where it goes.

Before removing the backing paper of each decal it is important to line up the hole and noticeable curves to ensure you align the decal properly before you start the application. Apply each decal individually.
You can remove the decal many times in the adhesion process but you must ensure you don’t stretch the decal (by pulling to roughly) when removing it for correct re-alignment.
It’s helpful to apply the centre strip of the decal and slowly ease out the decal to the extremities of the plastics. If you gently ease the decal out from the centre with your fingers it can give the decal the heat it needs to stretch the necessary amount to perfectly conform. Only do this when you are sure you have the decal correctly aligned with the plastics. You can peel back the decal to remove any air bubbles that might appear during the installation.
When you are completely happy with the decal installation you can apply gentle heat (not too much) over the decal with a hair dryer (heat gun not recommended as provides too much heat) to help the decals take the shape of the plastics.
You can also use heat when applying thicker materials but be careful as you don’t want to warp/distort the shape of the decals so they can’t fit your vehicle.
Your decals should now be perfectly applied.
We would love photos of your new decals on your machine. Please send them via www.facebook.com/motocal or to info@motocal.com
ORDER NOW & SHIP FREE TODAY
Design your graphics online today and Motocal will ship them for free today to you.


